#
Loading Dock Supply

credit cards
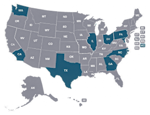
Stocking Locations
10 Stocking
Locations

BBB Logo

Strip Door Installation


Strip door component parts
Placement of strip door hardware
Strip size & overlap # pins between strips Overlap
6" 2/3 overlap 1 2"
8" 1/2 overlap 2 2"
8" full overlap 0 4"
12" 2/3 overlap 2 4"
12" Full overlap 0 6"
16" 1/2 overlap 4 4"
16" 3/4 overlap 2 6"
16" full overlap 0 8"
Strip door strip sequence placement
USM and strip door material assembly
(Fig. 3)
trimming strip door strips

INSTALLING YOUR STRIP DOOR

Your Loading Dock Supply strip door has been custom fabricated based on dimensions supplied to the sales representative. Before installing your door review your invoice to determine the style of Strip overlap and mounting position. Please be sure to read through the installation guide, in full, before beginning the installation.

PDF download

YOUR STRIP DOOR HAS FOUR PARTS

  1. The mounting bracket
  2. The strip retainer
  3. The hardware used to secure the strip retainer.
  4. The strips themselves.

MEASURE THE WIDTH OF YOUR OPENING
Mark the center point on the wall or lintel whichever is appropriate for your particular door.

MOUNT THE BRACKET(S) INTO POSITION
If there is more than one bracket lay the USM hardware out on the ground. Measure and mark the center of the total length, then label the brackets “A”, ”B”, ”C” , etc. so you may reference the correct order When mounting. Begin by mounting the bracket with the enter mark aligned to the center mark you made previously, then continue mounting the rest of the brackets in their respective positions. Note: It is important the brackets are seated tightly end to end.

(Optional) Counter drill your hole centers with a 5/16" bit to avoid splitting any wood within your door frame.

NOTE: For installations on refrigerator doors and other soft wall materials it may be necessary to use an additional piece of backer material to ensure the door will not damage the wall.

HANGING YOUR STRIPS
When you are ready to begin hanging your strips make sure to set aside the two strips punched at 1” Hole center and the strip with a sticker on it. The first strip to be mounted is the piece with a sticker on it. Begin mounting at the middle below your center line with the strip centered and the sticker facing you. Mount the next two on either side of the first strip so they curve in the same direction as the first strip mounted (see fig. 2).  Continue to mount the strips  in this sequence following the overlap your door was quoted for.
Note: The strips on the end of the door must curve towards the wall. If the strips do not curve towards the wall the seal will not be as effective.

SECURING YOUR STRIPS
Now that you have all of your strips mounted on the pins it is time to secure them with the 12” securement plates as seen in (Figure 3). Starting from one end secure the plates over the top of the strips with the supplied nuts. Once secured your door is ready for the last step in the installation process.

THE STRIPS ARE LONGER THAN YOUR OPENING IS HIGH.
Once your strips have acclimated it is time to trim to match the level of your floor. To determine the point at which to mark we suggest you use a piece of wood or other straight edged object as seen in (Figure 4). When marking with a sharpie pen you might also consider putting a piece of paper on your working surface to avoid marking your floor. Once you have marked your strips it is time to trim. Using a razor knife, or other cutting implement, cut the strip door material at the line you have made.

ADDITIONAL NOTES:
The strips may be so concave they do not properly seal when first installed; this is especially true in cold environments. Over time this will flatten out, creating the proper overlapping closure. You may need to trim the strips once more once the strips have fully acclimated about 1-2 weeks later.

Strip door hardware dimensions
Strip door hardware profile dimensions

Ask About
Quantity Discounts

Monday-Friday

9 am - 6 pm EST

Call the Experts!
+1 (800)741-1258

Electric trailer restraint
Reg. Price:
$5,800.00
Sale Price:
$4,360.00
Save:
$1,440.00
add product

Electric Trailer Restraint
More than 38,000 lbs. of Restraining Force
9" - 30" Operating Range

Pit leveler brush seal
Reg. Price:
$100.00
Sale Price:
$75.00
Save:
$25.00
add product

Pit Leveler Seal Brush Seal Kit
7' mechanically fastened sections with 1.5" brush
Aluminum Hardware
Seals all sides

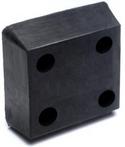
molded 2 hole DB-13 Bumper
Reg. Price:
$55.20
Sale Price:
$32.84
Save:
$22.36
add product

DB-13 Molded Dock Bumper
4" Thick x 10"High x 13" Long

Molded Bumper Model R
Reg. Price:
$66.40
Sale Price:
$39.50
Save:
$26.90
add product

4" Thick x 12"High x 13" Long
Type R Bumper
Edge of dock leveler bumper

sales@loadingdocksupply.com
Contact Us
1-800-741-1258
Loading Dock Equipment, Loading Dock Ramps, Dock Bumpers, Dock Boards, Yard Ramps, Dock Lights, and Industrial Equipment

Serving OH, AL, AK, AZ, AR, CA, CO, CT, DE, FL, GA, IA, IL, IN, ID, KS, KY, LA, ME, MD, MA, MI, MN, MS, MO, MT, NE, NV, NH, NJ, NM, NY, NC, ND, OK, OR, PA, RI, SC, SD, TN, TX, UT, VT, VA, WA, WV, WI, WY

Loading Dock Equipment
October 31, 2019

Get a Quote